
What changes when you ride bigger, steeper jumps?
Taller and steeper take offs can be intimidating and for good reason. Over the past five years, I’ve spent lots of time instructing, riding and watching others ride at Wynyard Jump Park. Being a mountain bike instructor it’s difficult not to use the coach’s eye when watching others ride.
When riders start stepping up to bigger jumps, most focus on more speed, pulling up on the handlebars, or trying to muscle their bike through a steeper lip. But bigger jumps don’t require more effort—they require a variation in technique around the zone of compression and the ability of a rider to make full use of that zone of compression to resist or make use of the forces that the jump naturally has.
In the following article I’ve deconstructed proper technique when taking on bigger jumps, especially ones with steeper take offs.
Please note: While the images in this article are of a large jump, for safety reasons the steps and techniques outlined in this instructional are best followed on a much smaller jump, ideally a medium-sized table-top jump.
Anyone attempting these techniques needs to be comfortable on jumps and riding faster or slower depending on the challenge and terrain. Any risks you take when following these instructions are your own.
Top tip: I usually teach a bulk of this technique on flat ground and apply on small to medium sized table tops even before we think of progressing to something bigger.
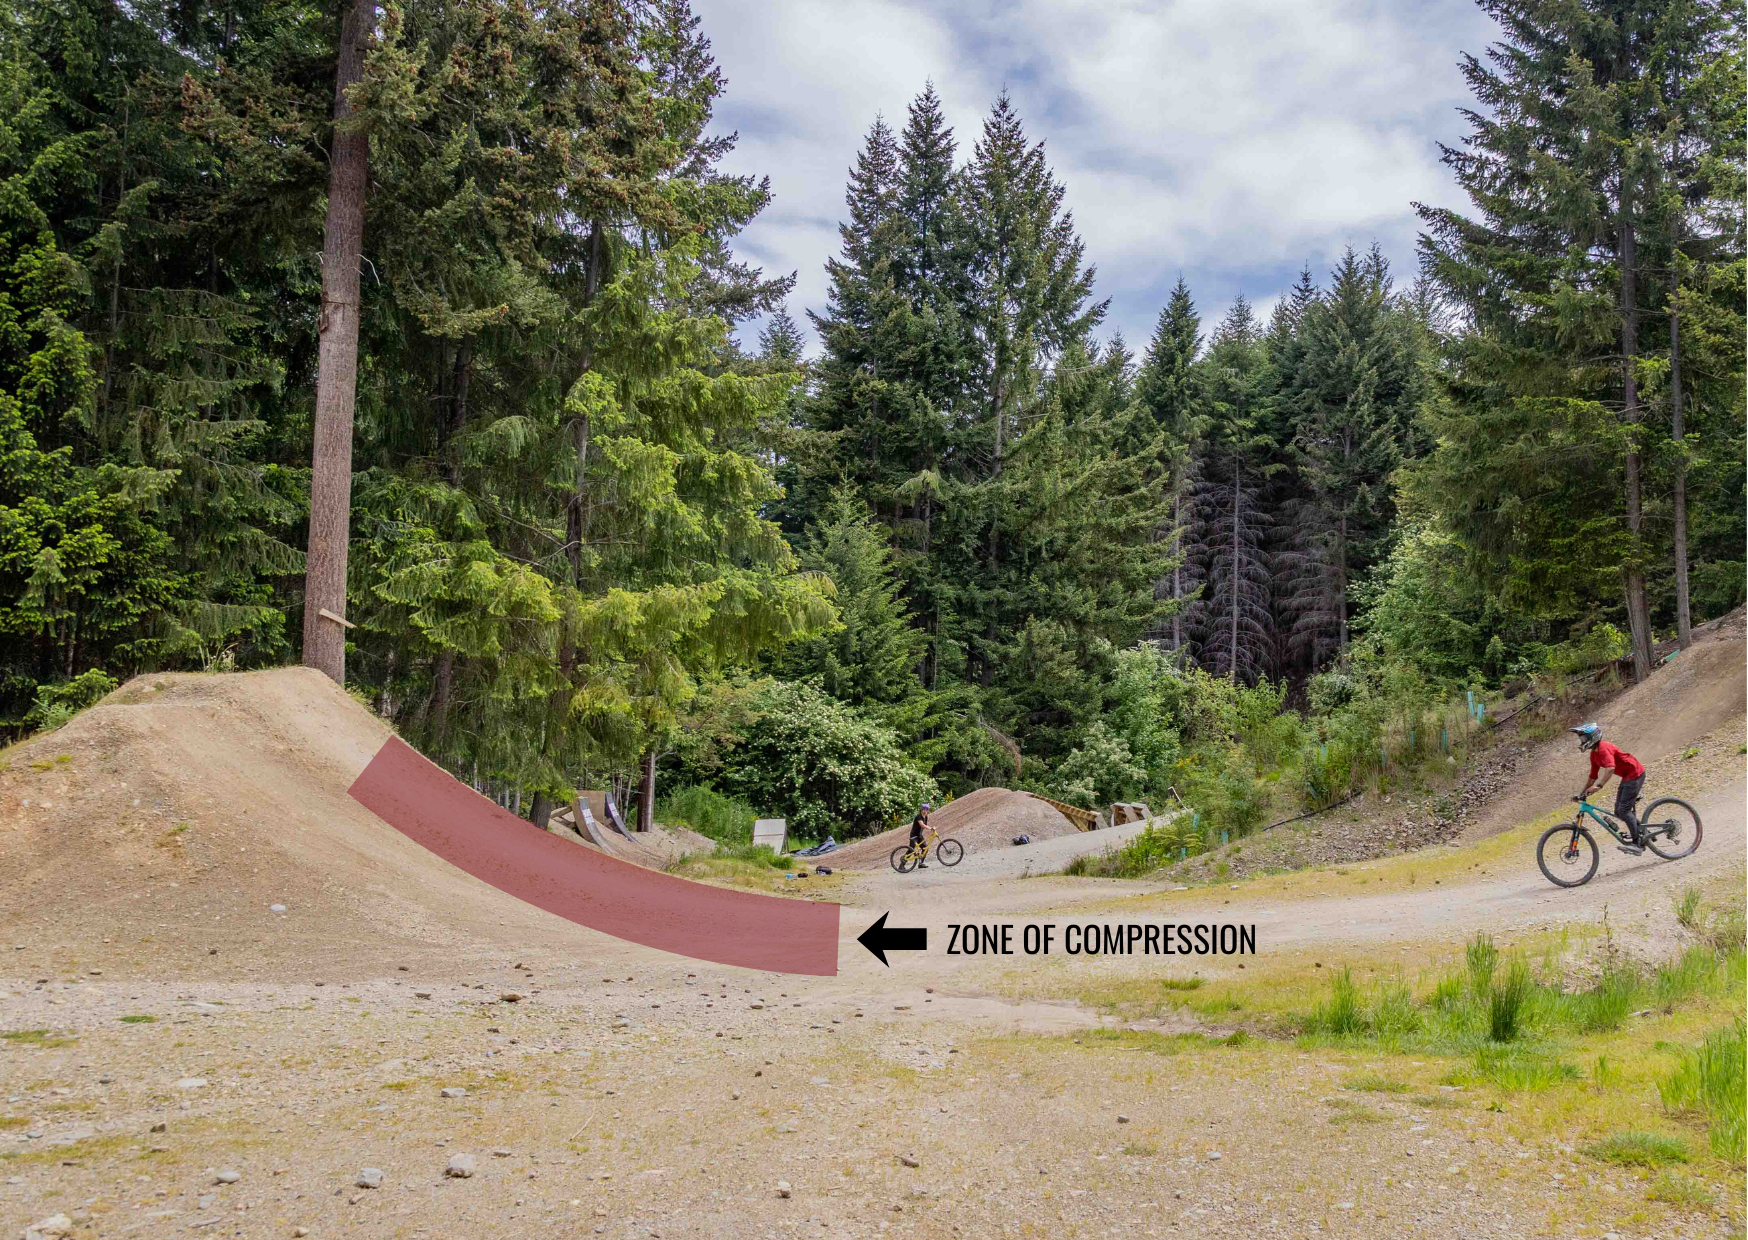
The zone of compression
The zone of compression
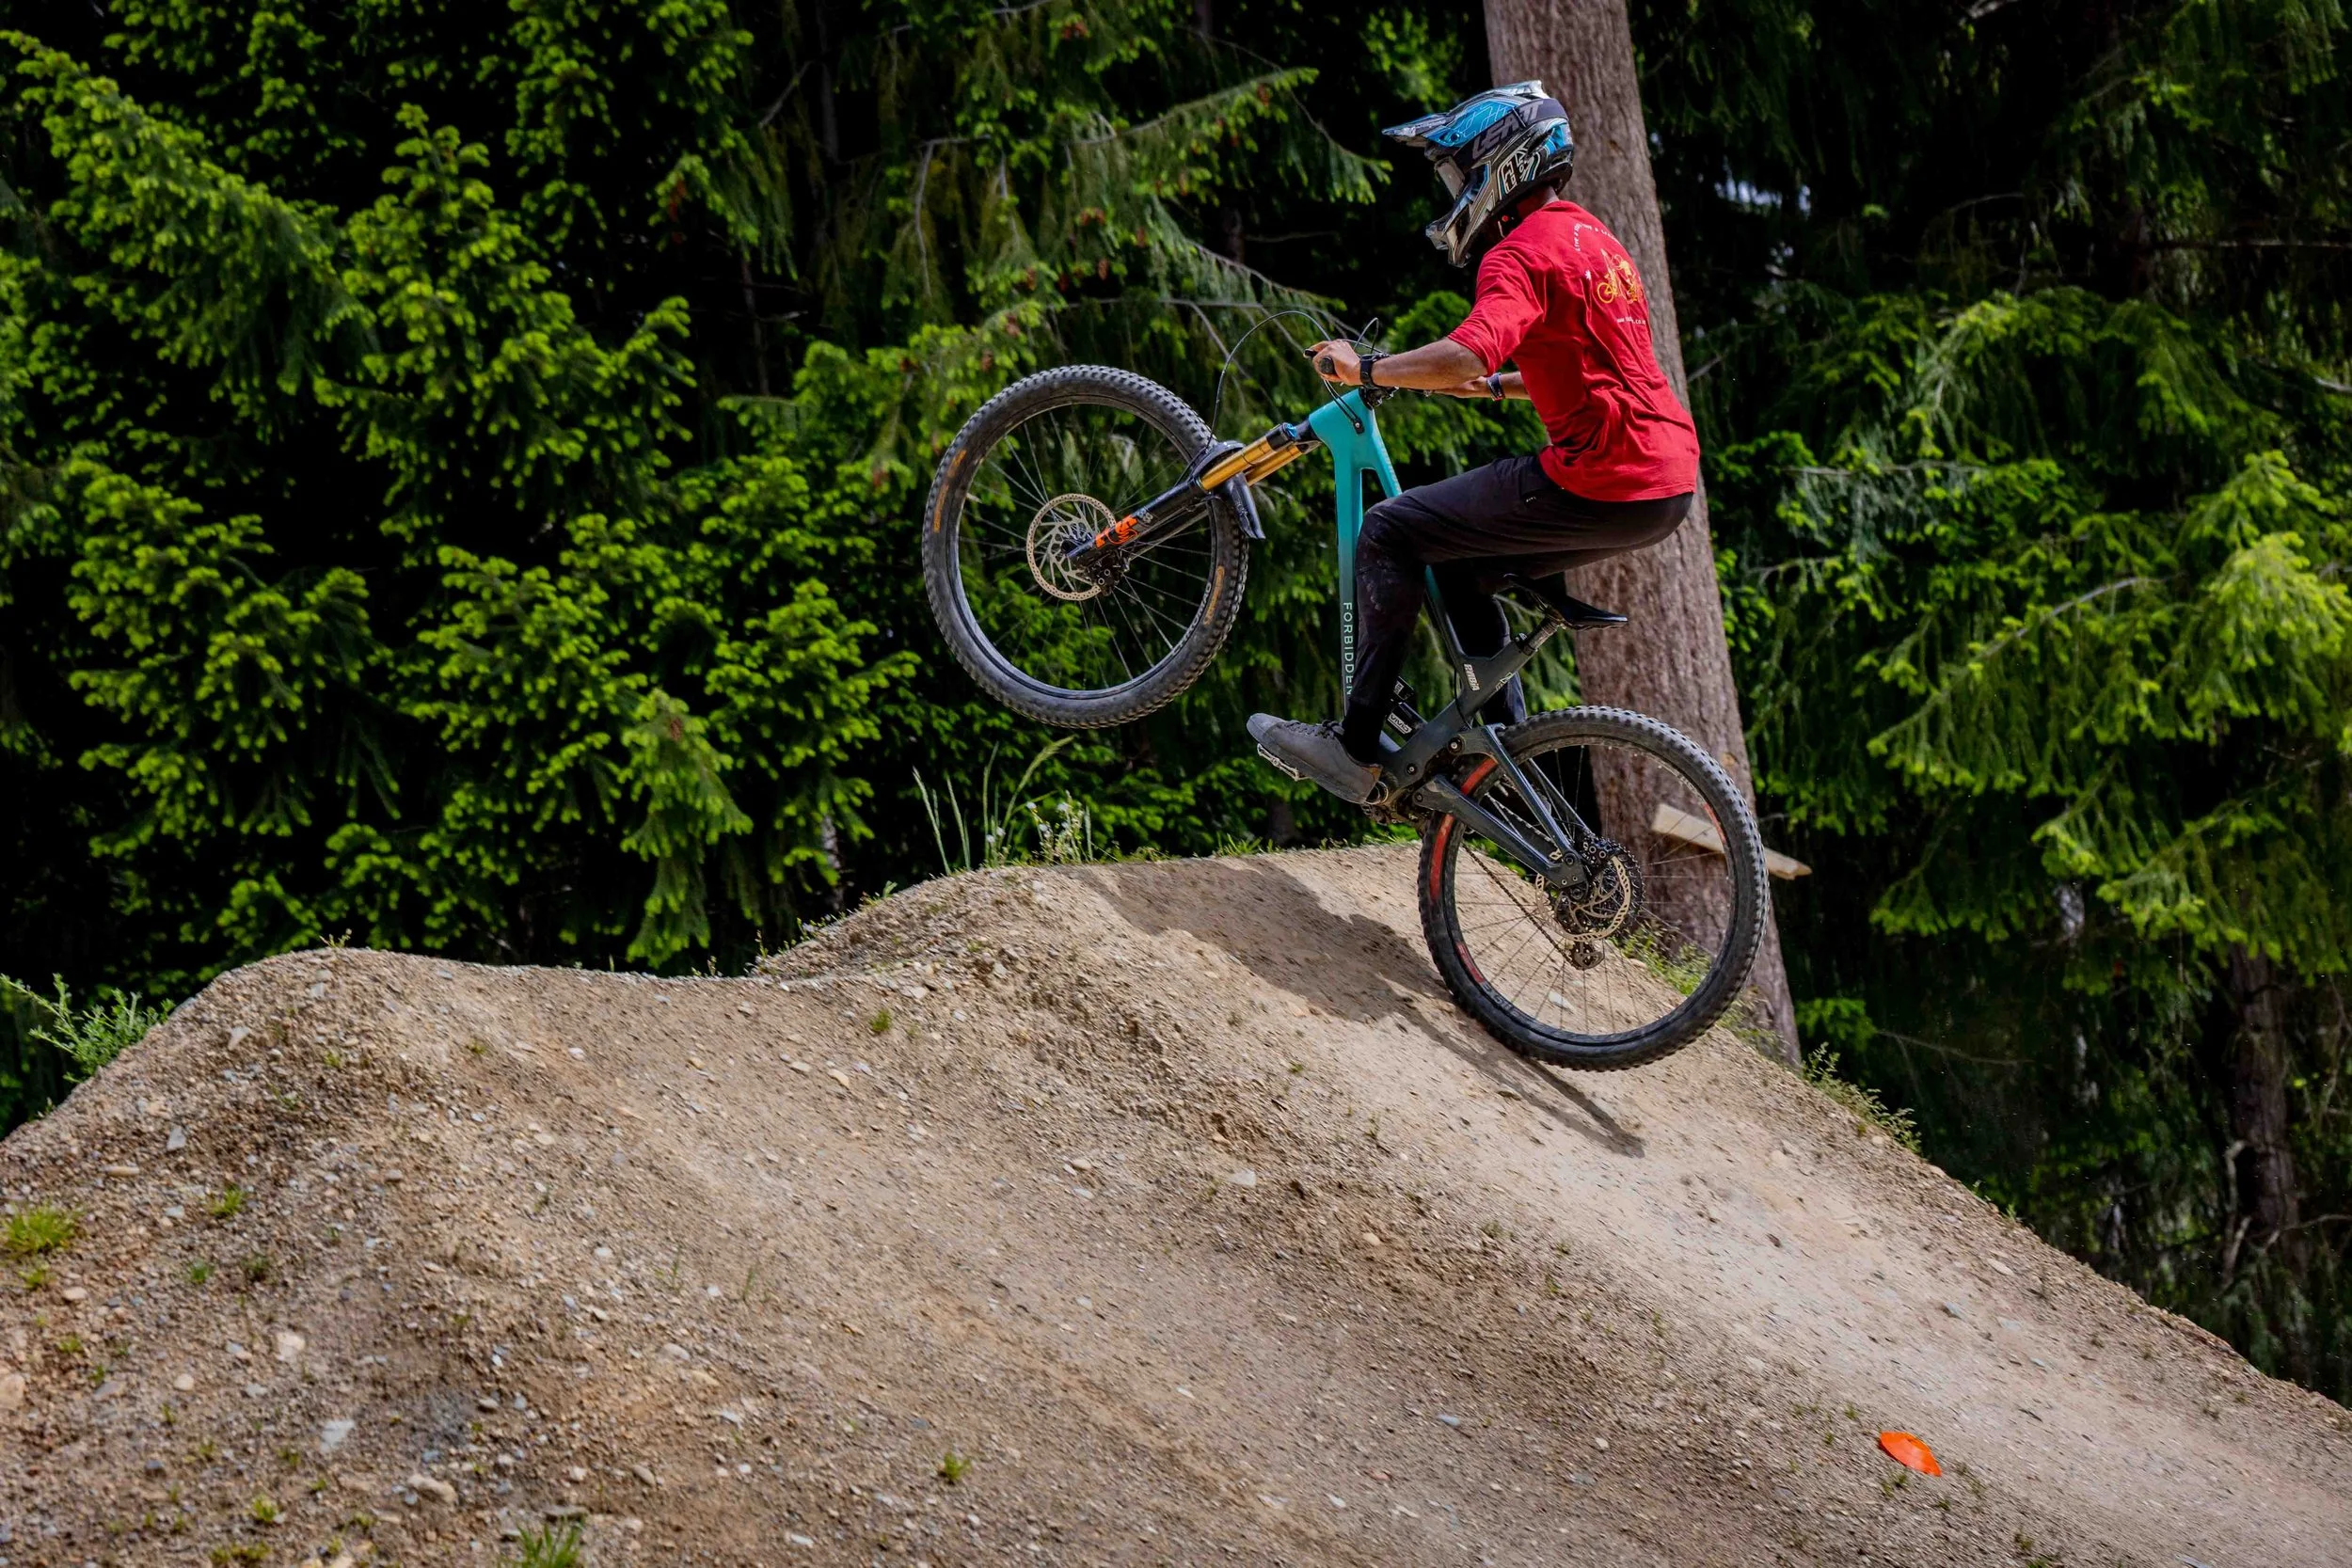
The take off really has two parts. The first is where we compress into the jump and the other is the lip of the jump where we take off. How high you go, how balanced you feel, and how clean your airtime is does not come from the top of the take off but the first part of the jump, in the zone of compression.
This zone starts at the flat surface just before the ramp and goes past the halfway mark of the take off itself. This is where you build pressure. And how you build pressure in this zone determines exactly how you’ll feel in the air.
The approach
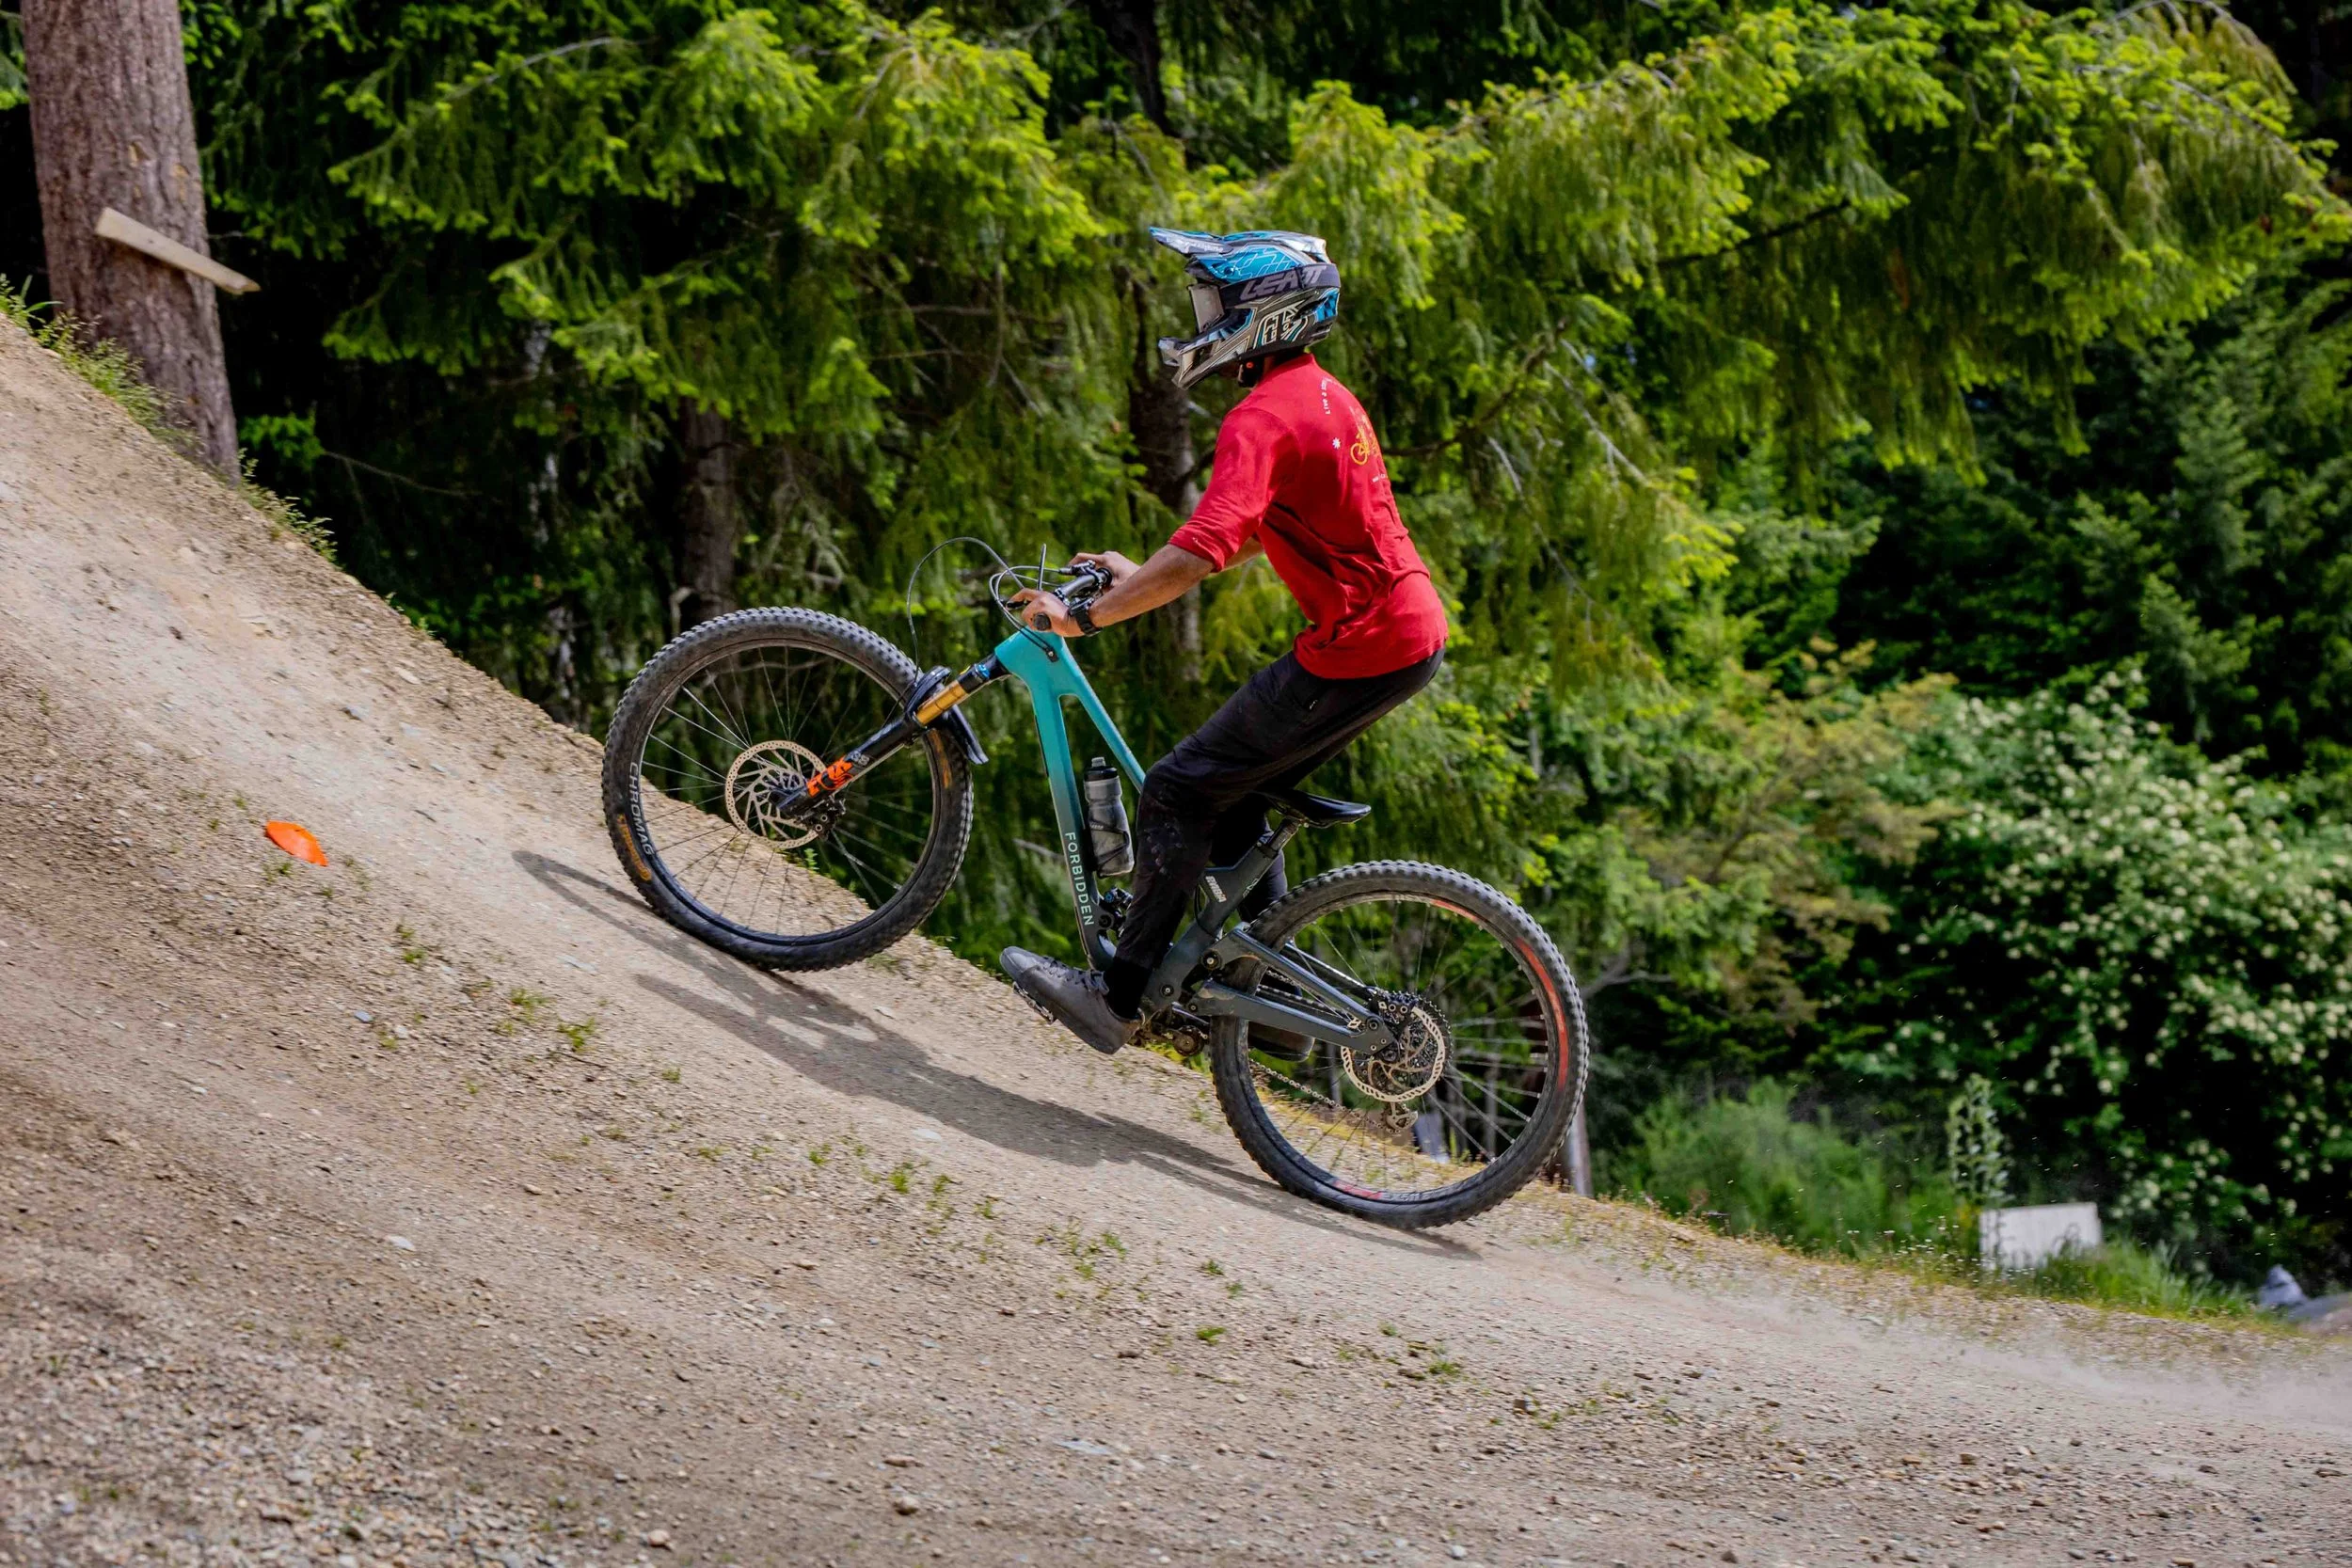
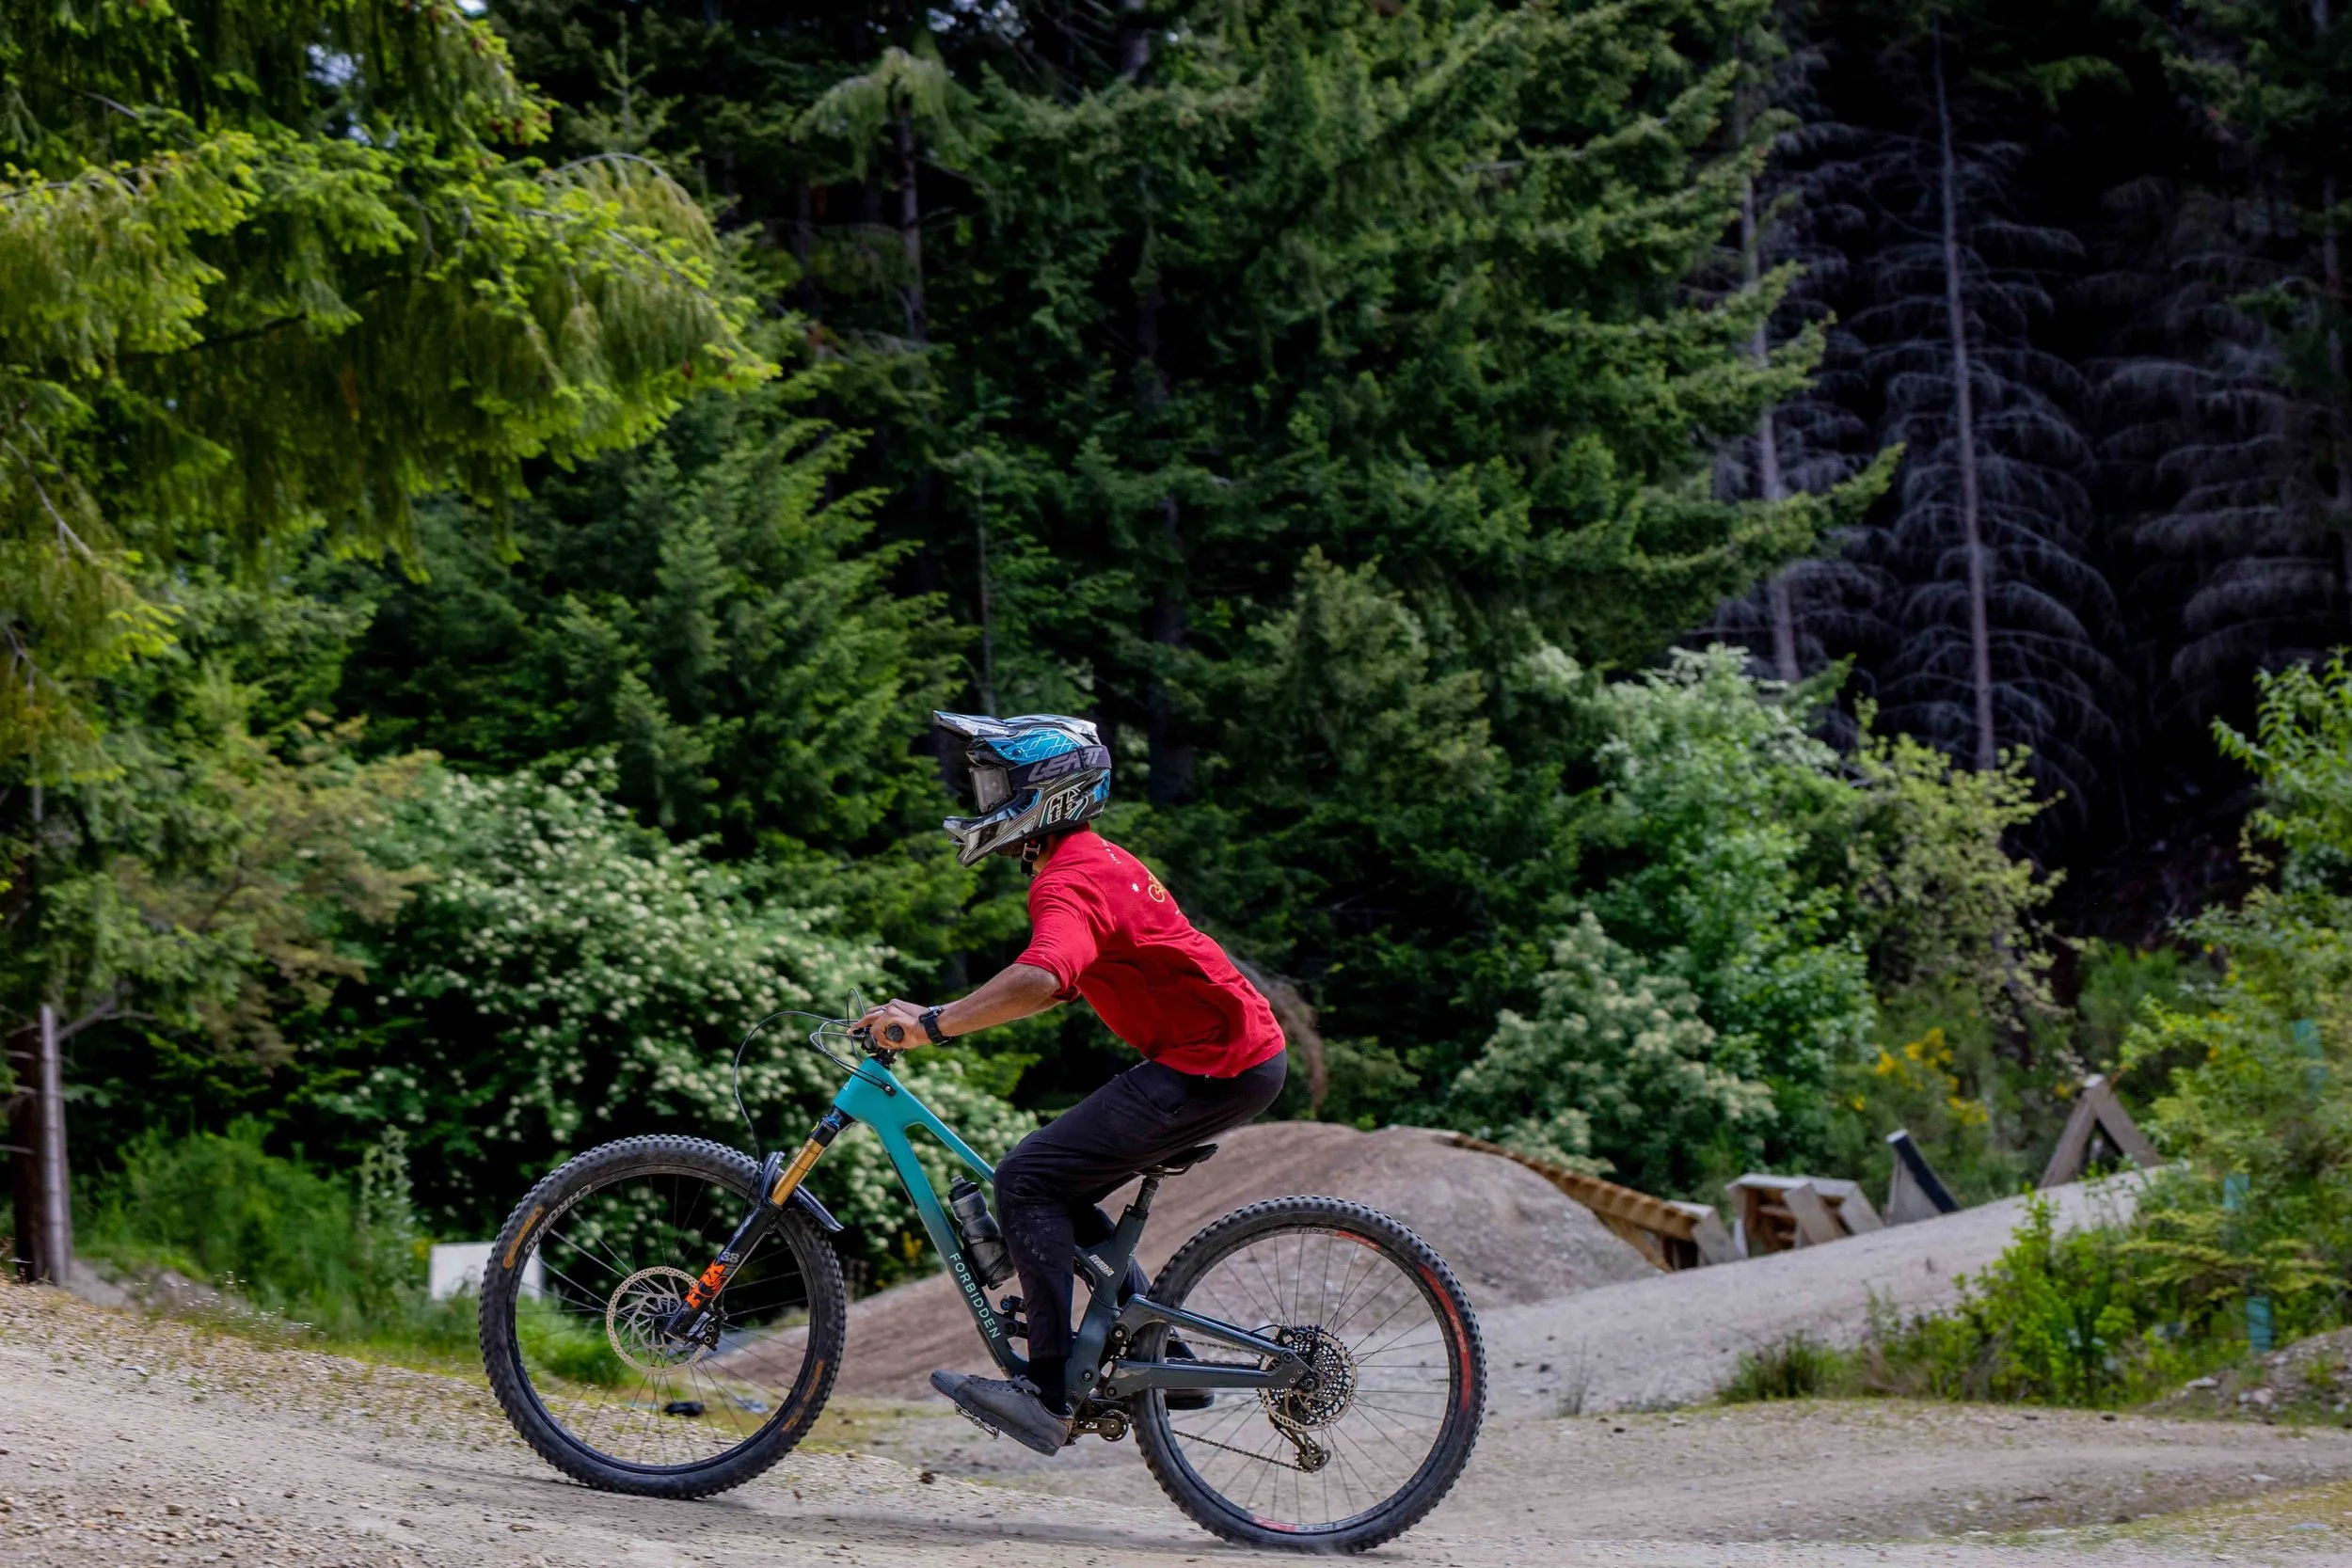
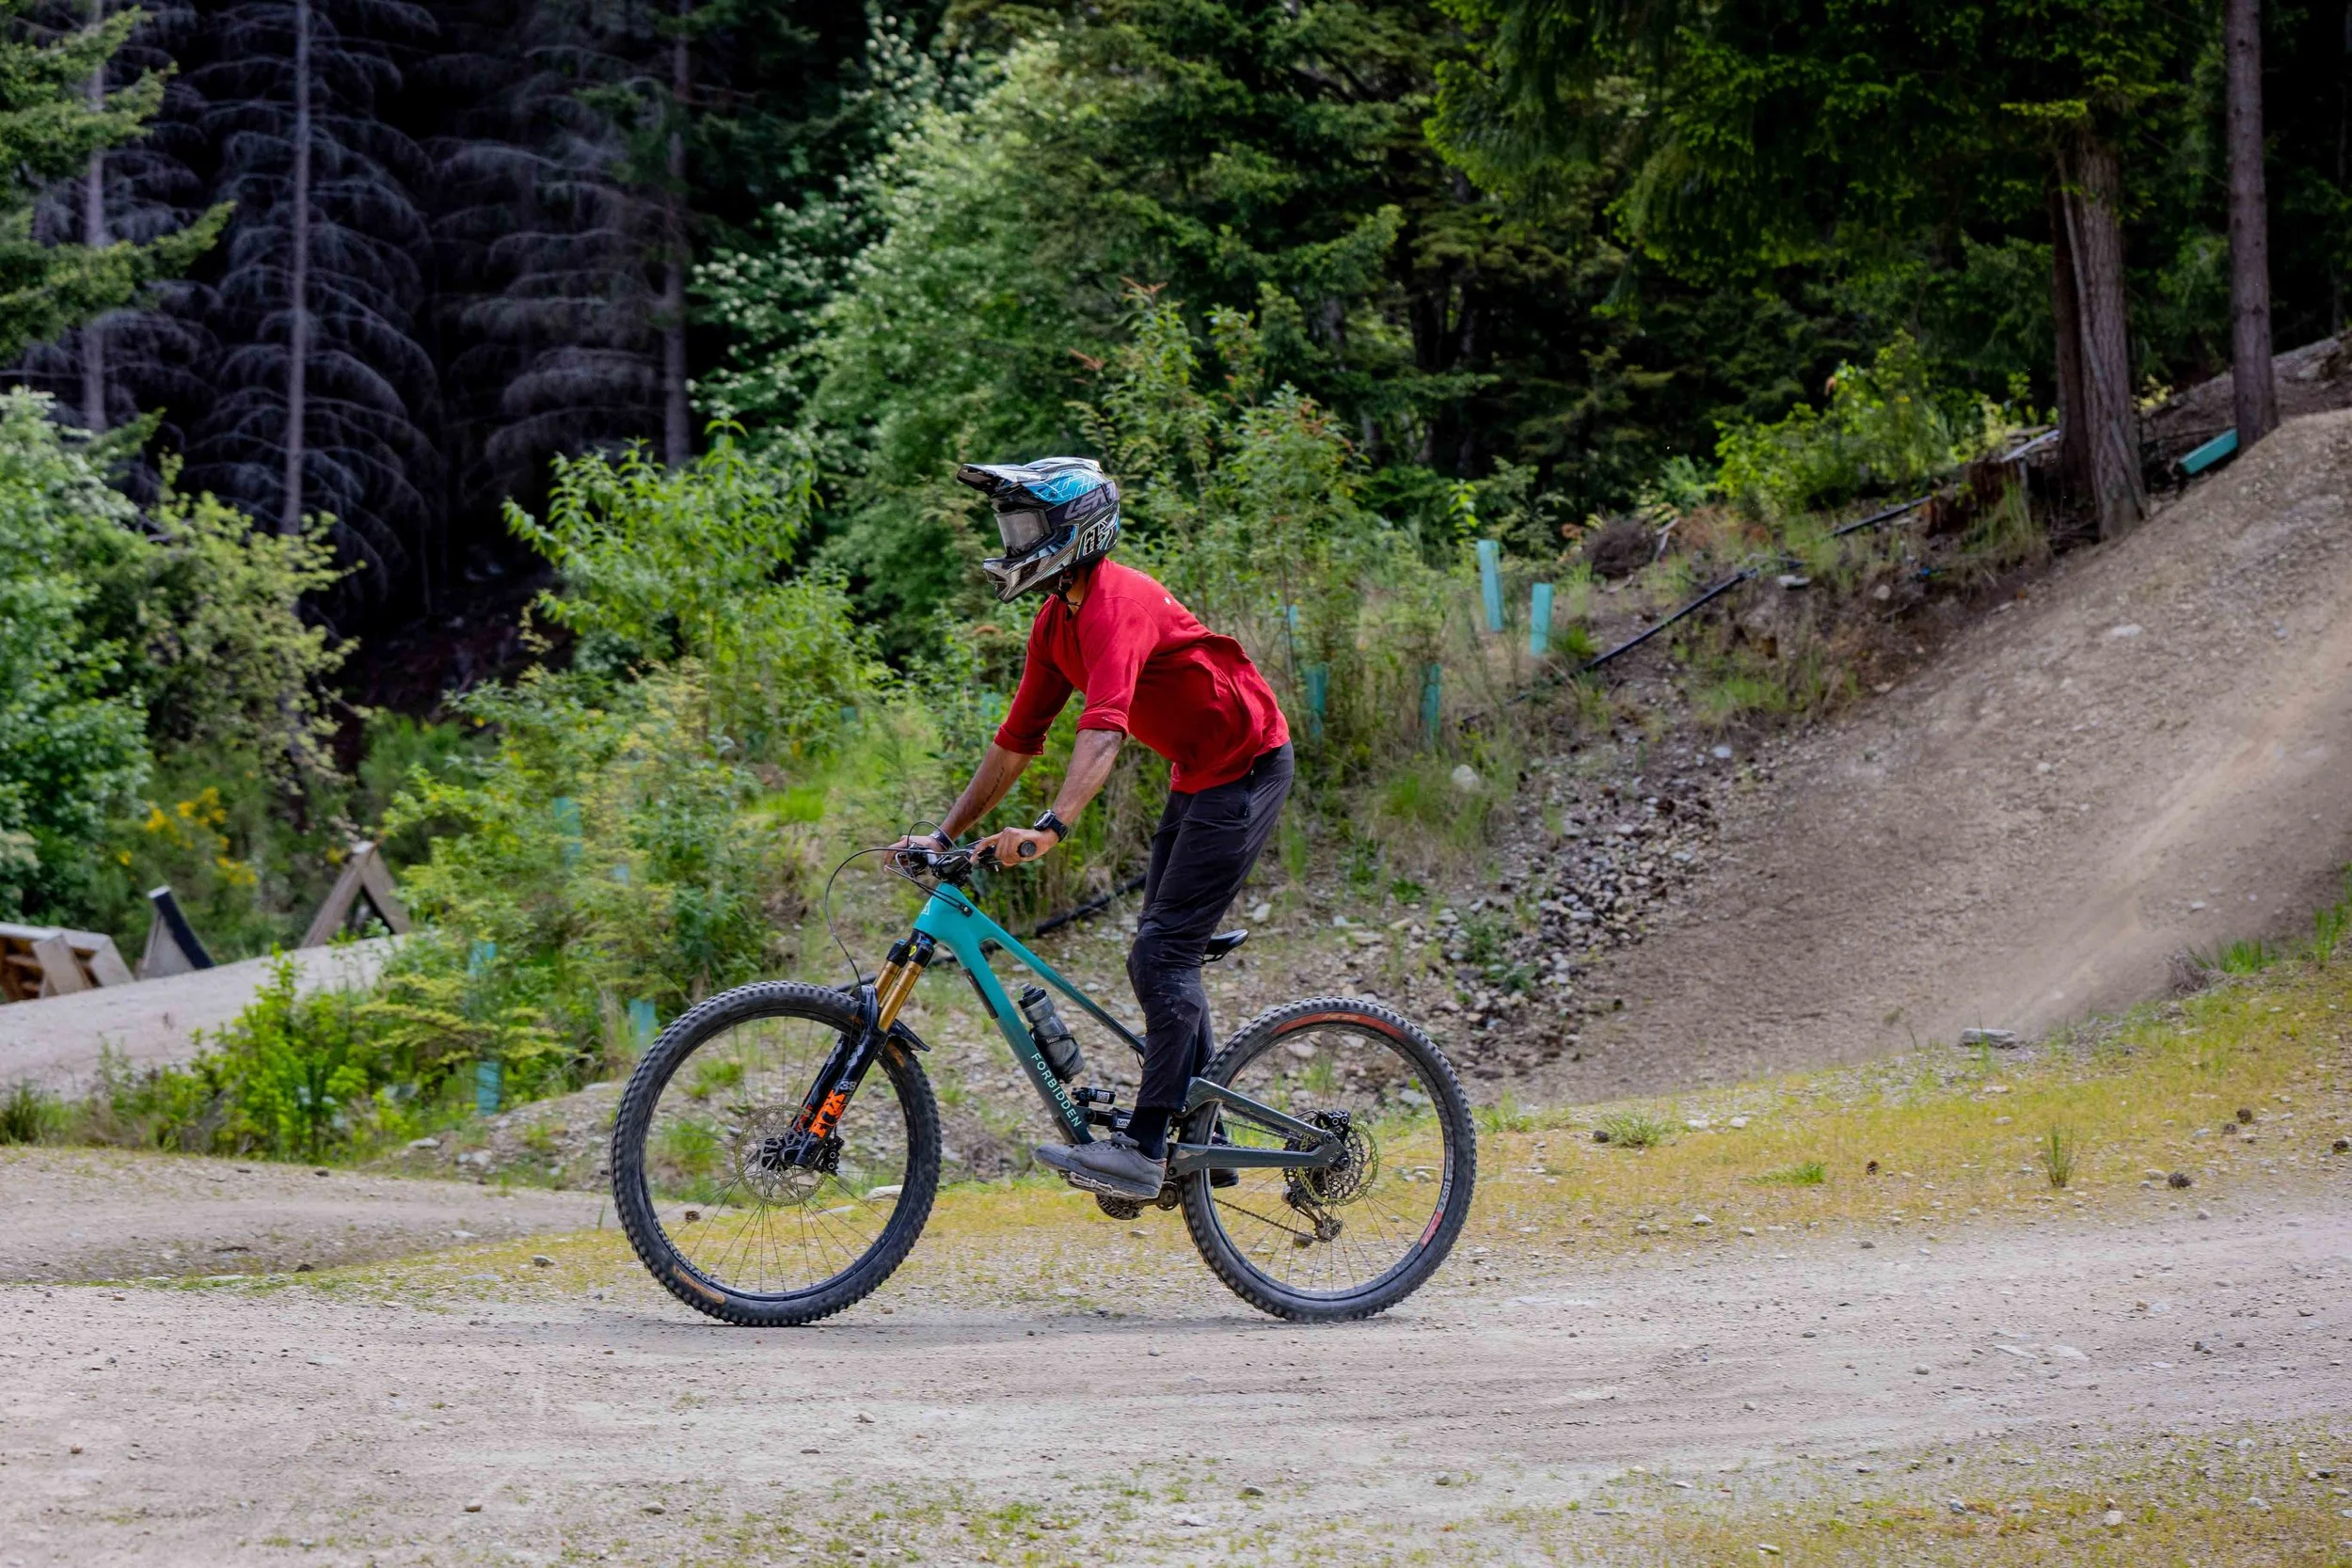
On the approach to the takeoff, your body position is the fundamental base. When you’re riding bigger jumps, your body position should be as strong and centred as possible before you reach the takeoff. The easiest way to do this is simply to stand up before the jump.
On the approach of the jump, you need to be in a tall, strong position with the weight of your body going through the feet. Your hips should be over your feet with straight legs (not hyper extended).
Why this is important:
All your weight is over your feet with level pedals, heels slightly dropped: When this is aligned, your weight goes straight down into the pedals rather than collapsing through bent joints under force.
Creates inherent stability: A stable frame gives you a solid platform to push from. Instability here equals instability during the compression which causes inconsistent and awkward airtime.
Centres your mass over the bike: With your weight organised directly through your feet, you’re naturally balanced in the middle of the bike—this is exactly where you need to be to generate pressure properly.

Tall relaxed and Neutral position
Tall and strong neutral position
In this image you can see that my chin is right over the stem—that’s a good visual reference to know I’m in the centre of the bike. As a “feeling” reference you should feel that your entire weight is going through the feet and your hands should feel relatively light.
How stable is your neutral position?
Do you struggle to balance in your neutral position on flat ground?
Does your weight feel unsteady and moves back and forth when you brake?
Or can you stay in this position with relative ease and this is also your default position when riding an easier section of the trail?
If you answered YES to the first two questions, you might need to work on strengthening the position first before we tackle any larger jumps.
Larger jumps, which often have steeper lips, come with more pressure and it is imperative for the rider to have a stable position in order to build or absorb that pressure from the take off effectively. That inherent stability is what allows you to load the bike, build smooth pressure in the zone of compression, and ultimately stay balanced during takeoff and in the air.
Now let’s get into the technique side of things and understand what variation in technique is required for a larger and steeper take off.
Absorbing a jump
Absorbing
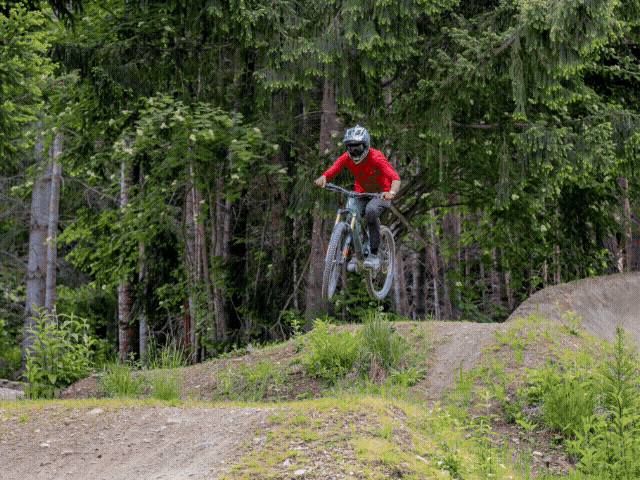
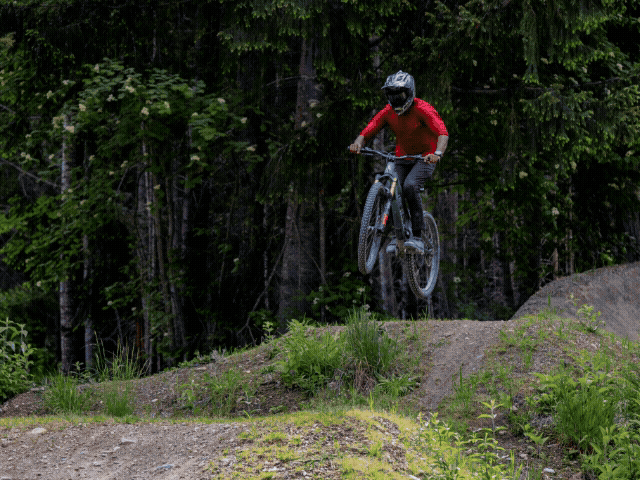
Absorbing is what most intermediate (and even many advanced) riders default to. You essentially absorb the upward trajectory of the bike through your arms and legs. This generally works well on smaller, mellow takeoffs. Essentially if your arms and legs are fairly bent in the air – you have absorbed the take off.
Extending
Extending is the technique usually needed for jumps with longer and significantly steeper lips. It lets you stay centered, build the right amount of pressure by making use of the entire zone of compression, and create stable, predictable airtime especially on jumps that are designed to send you upwards first.
To ride all jump shapes consistently, you must be able to switch between both and understand when to create pressure in the jump and when to absorb it.


Absorbing a jump
Let’s understand how to Absorb a jump so we can build a better context on how to extend and go for a pop.
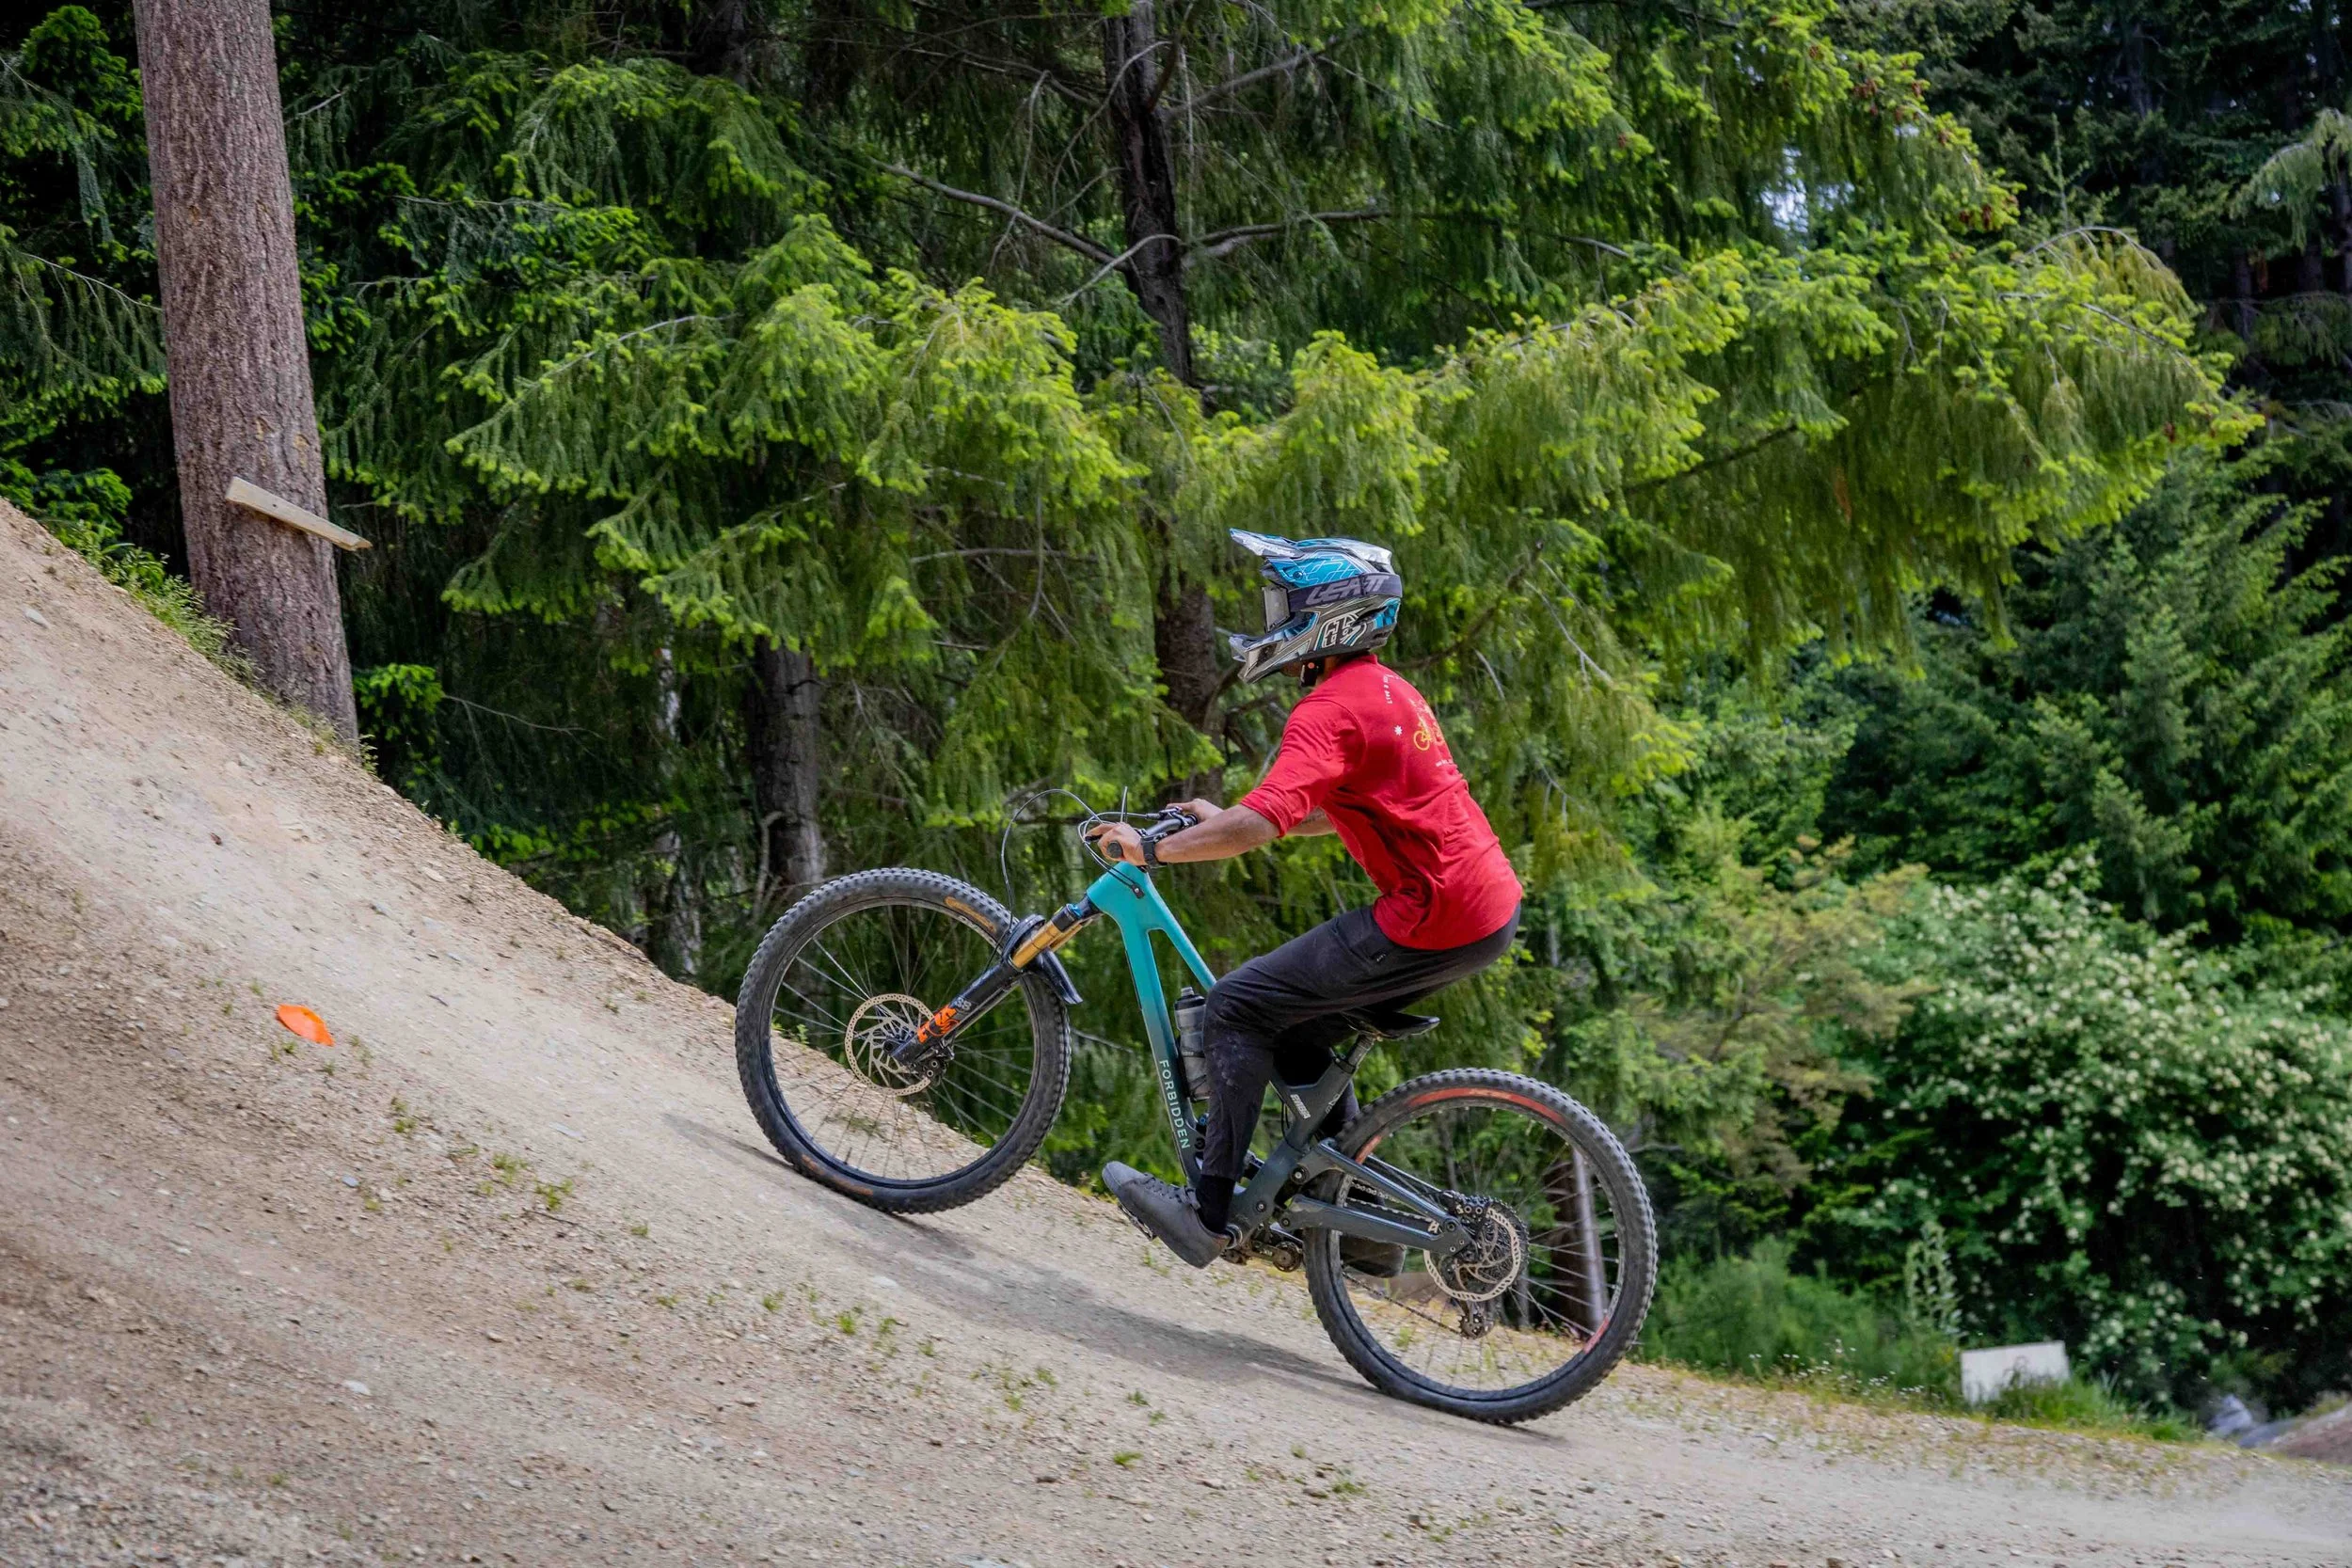
If I’m choosing to absorb a jump, I still approach it in the same tall, strong, centred position. That never changes. A stable approach keeps me balanced over the bike and ensures all my weight is going through my feet.
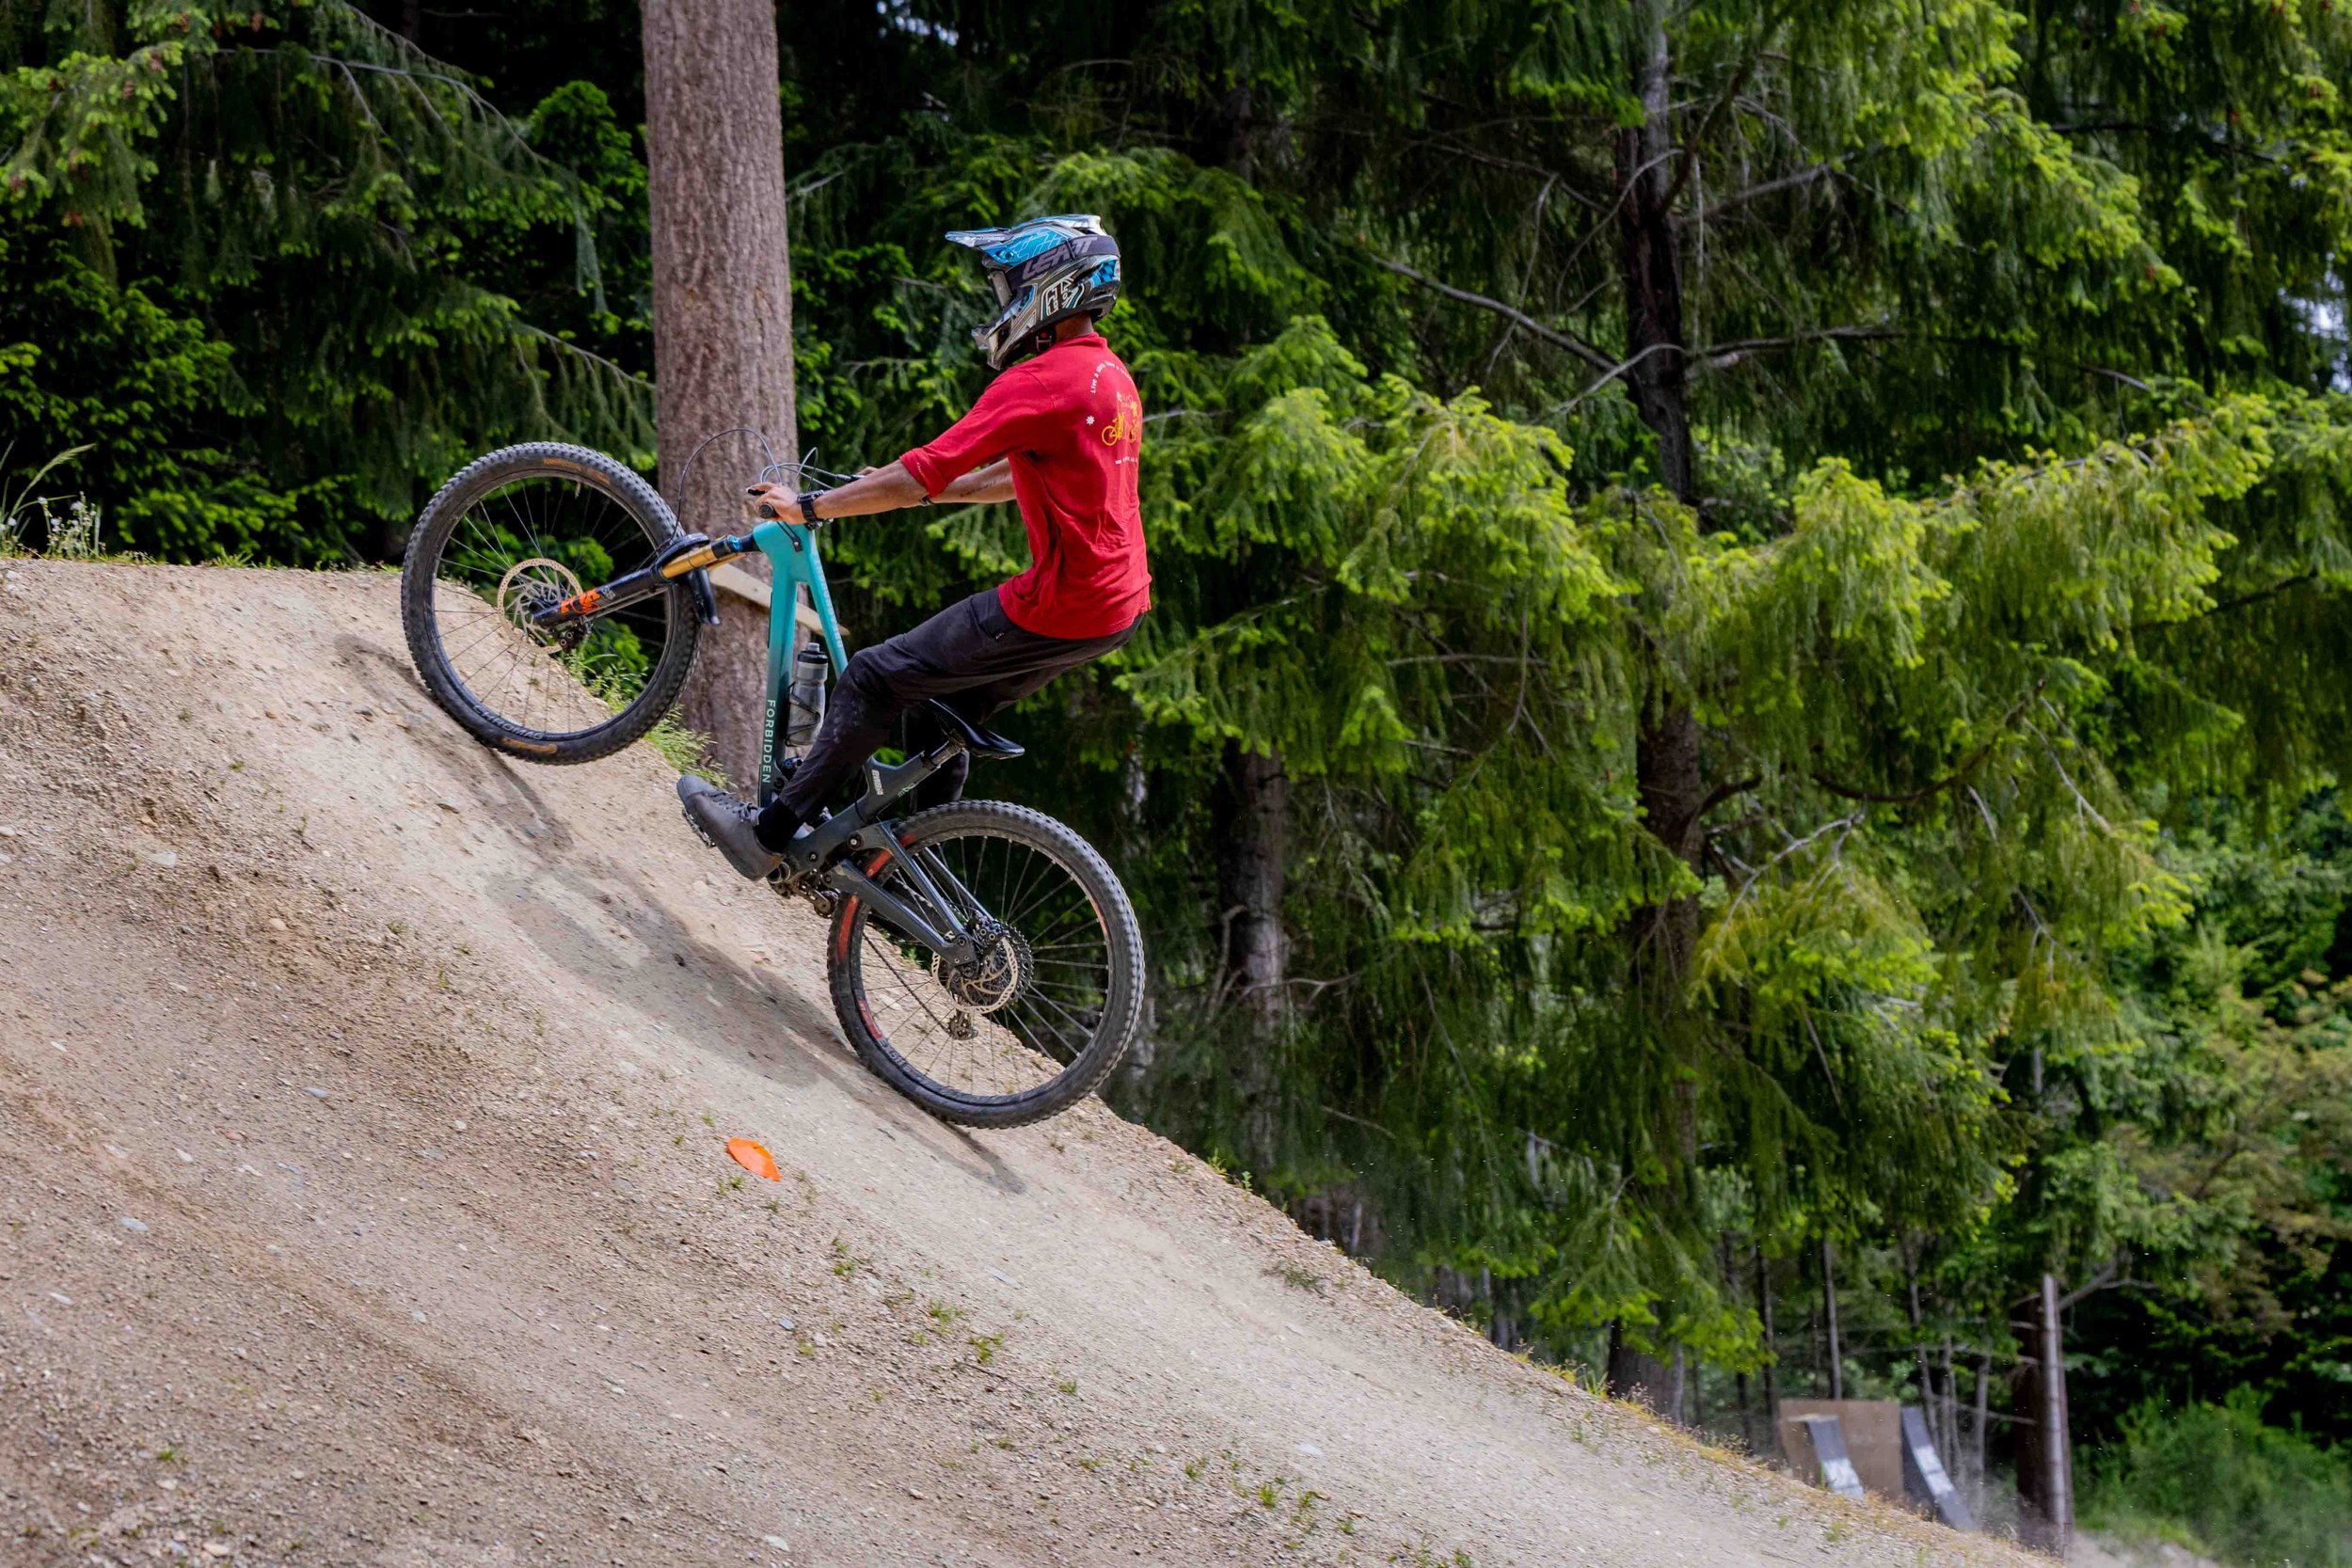
In the second image, you’ll notice that as I enter the zone of compression, I still begin with a light press at the bottom of the takeoff right where the first orange cone is.
As I continue to press through the zone of compression, you’ll see me start to rise up earlier. I get taller before the second orange cone (signifying the end of the compression zone) and this is the key difference.
By standing up sooner:
I don’t use the entire zone of compression
I release pressure before the ramp has finished
Now, because I’m taller and there’s still more take off left, the rest of the takeoff pushes into my body. Instead of me pressing into the take off, the take off is pressing into me. I’m intentionally soaking up the pressure on the rest of the take off by bending my arms and legs.
This leaves me in the air with:
Bent elbows and knees
A lower upward trajectory
Essentially, I’ve softened the jump and absorbed the energy I could have used to go higher or further.
On most jumps this works just fine and in a lot of ways it is often safer to do. Although now we’ll challenge this technique and see how we can make use of the entire zone of compression to give us more airtime.
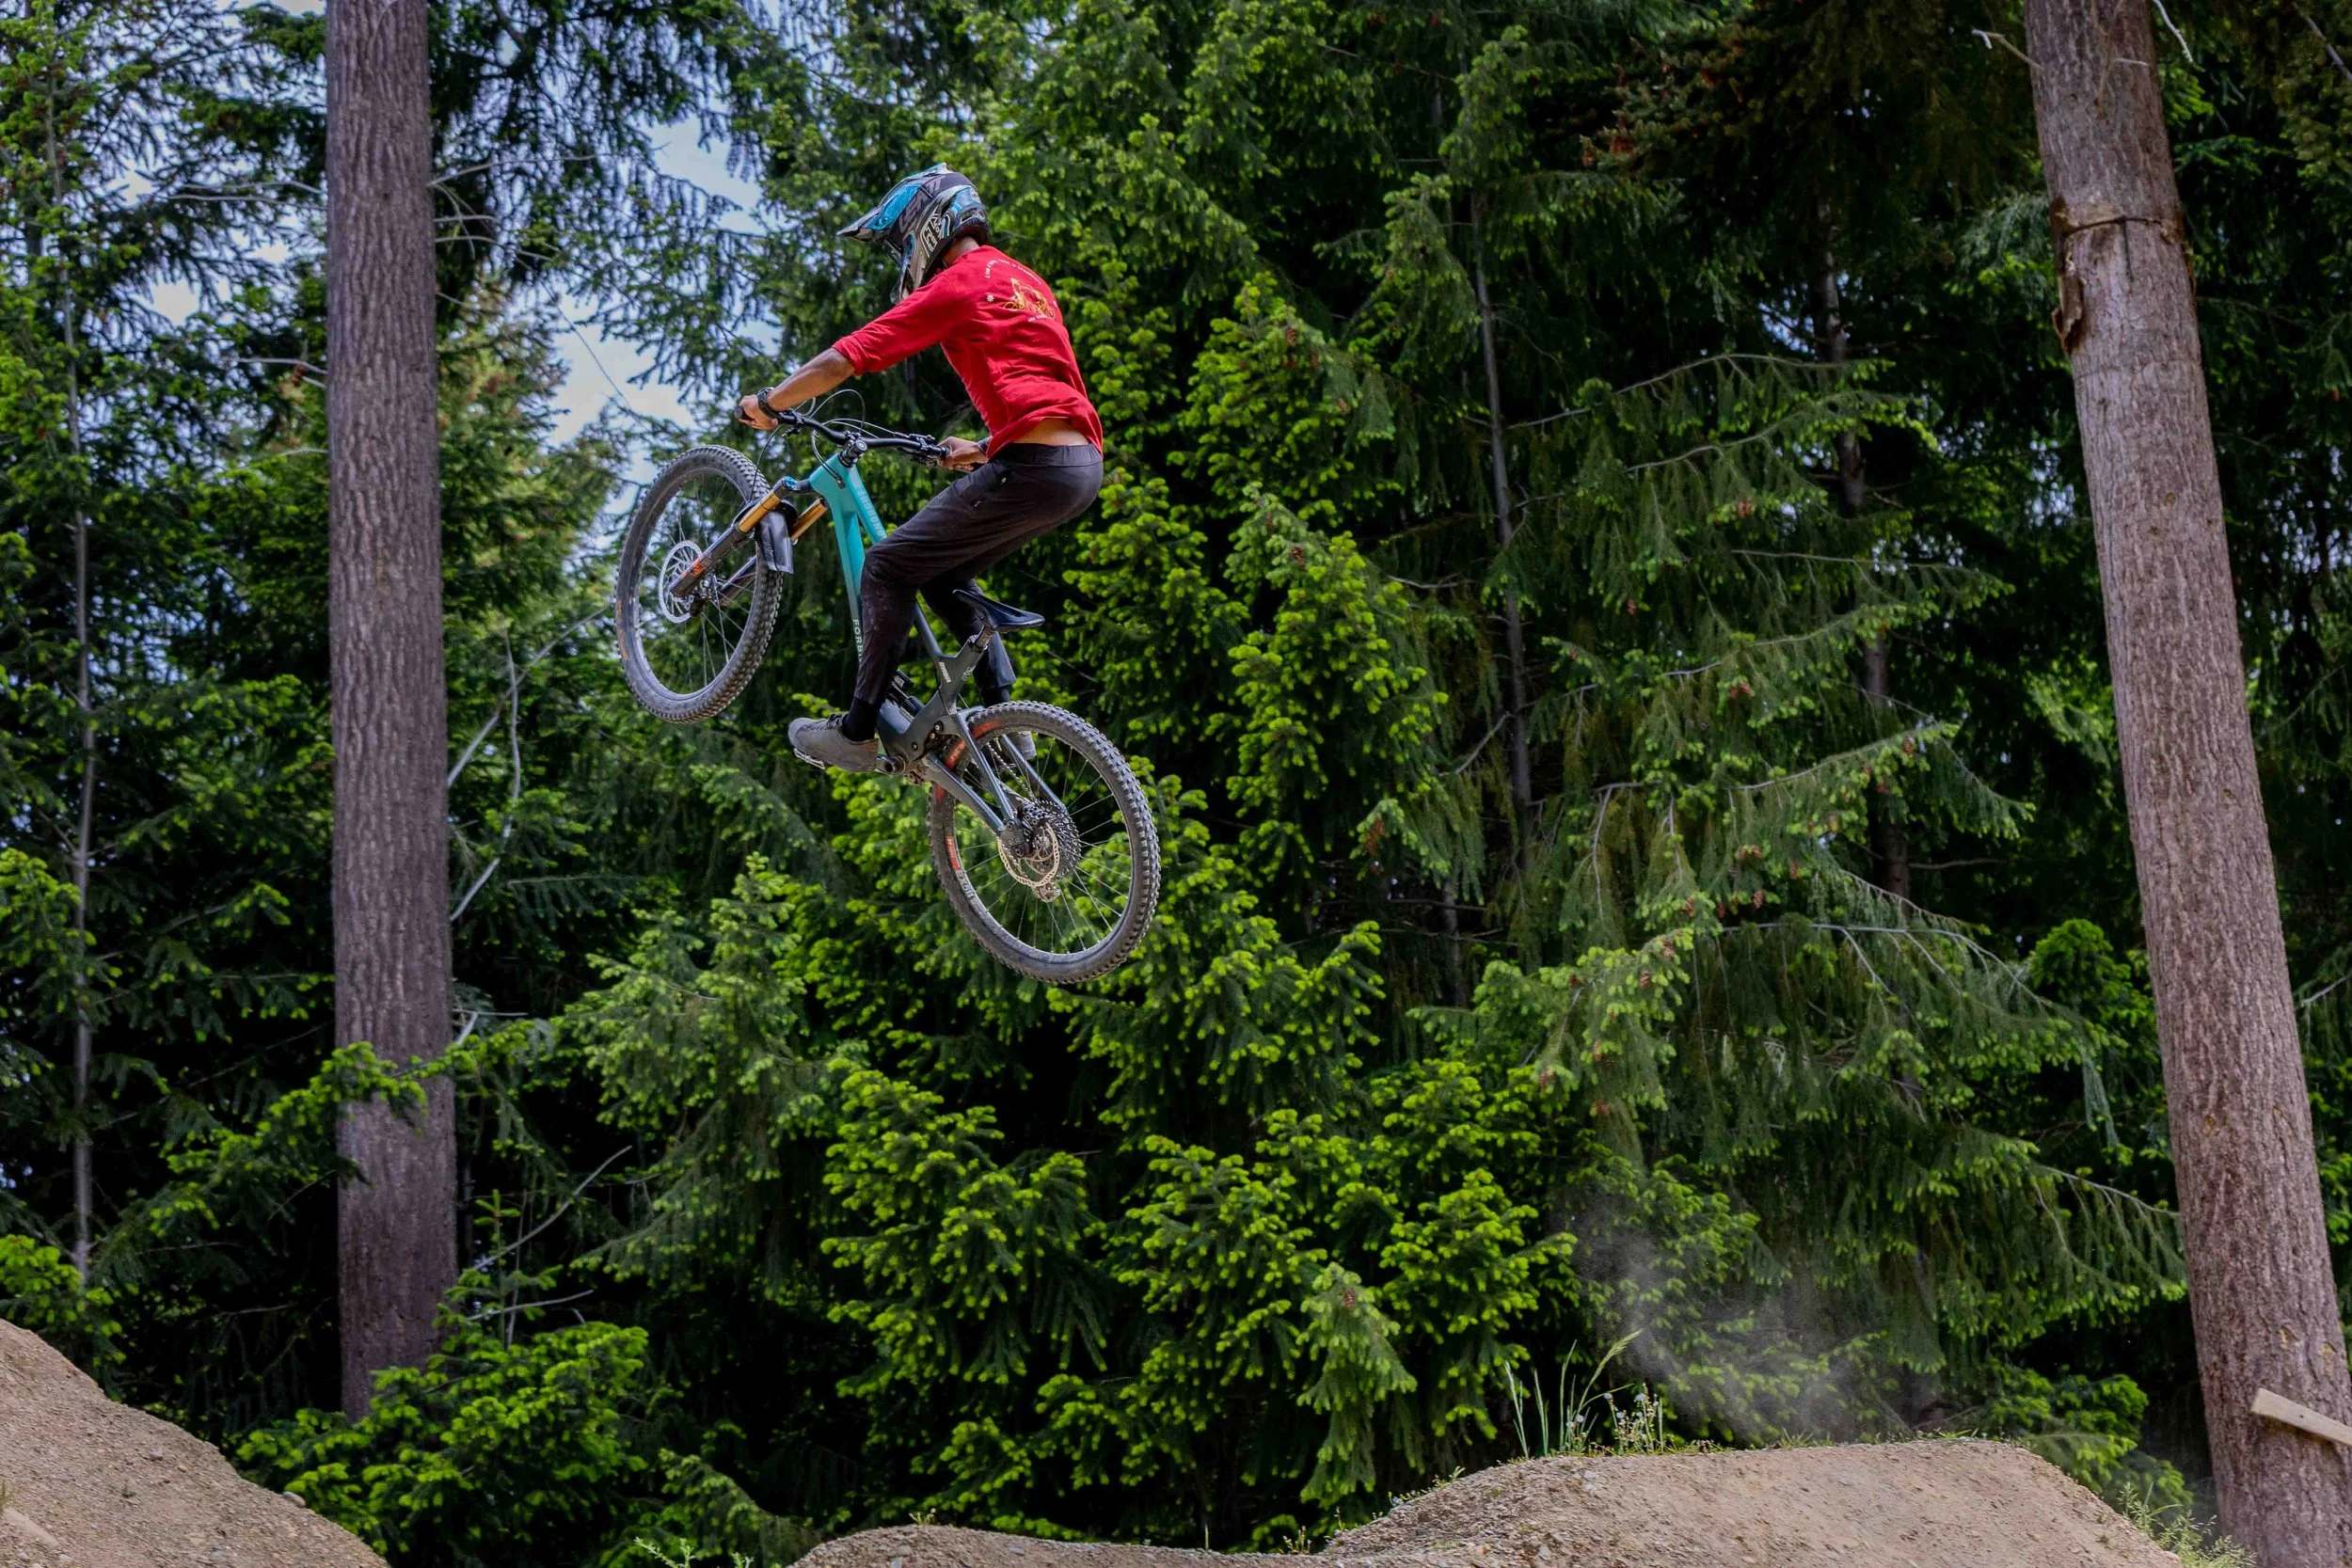
Extending or going for ‘pop’: Pressing Through the Zone of Compression
Enter Tall, Strong, and Centred
As you near the start of the zone of compression, you should still be in your tall, strong, stacked position. I must remind again of the fundamental piece of the position: A strong, stable position on the approach to the jump makes a massive difference in:
How effectively you press into the take off
How well you manage pressure through the zone of compression
How clean and predictable your air time feels
If your position is weak with bent knees, hips sinking back into a squat or feet unsteady on the pedals—all of that gets magnified the moment you enter the jump.
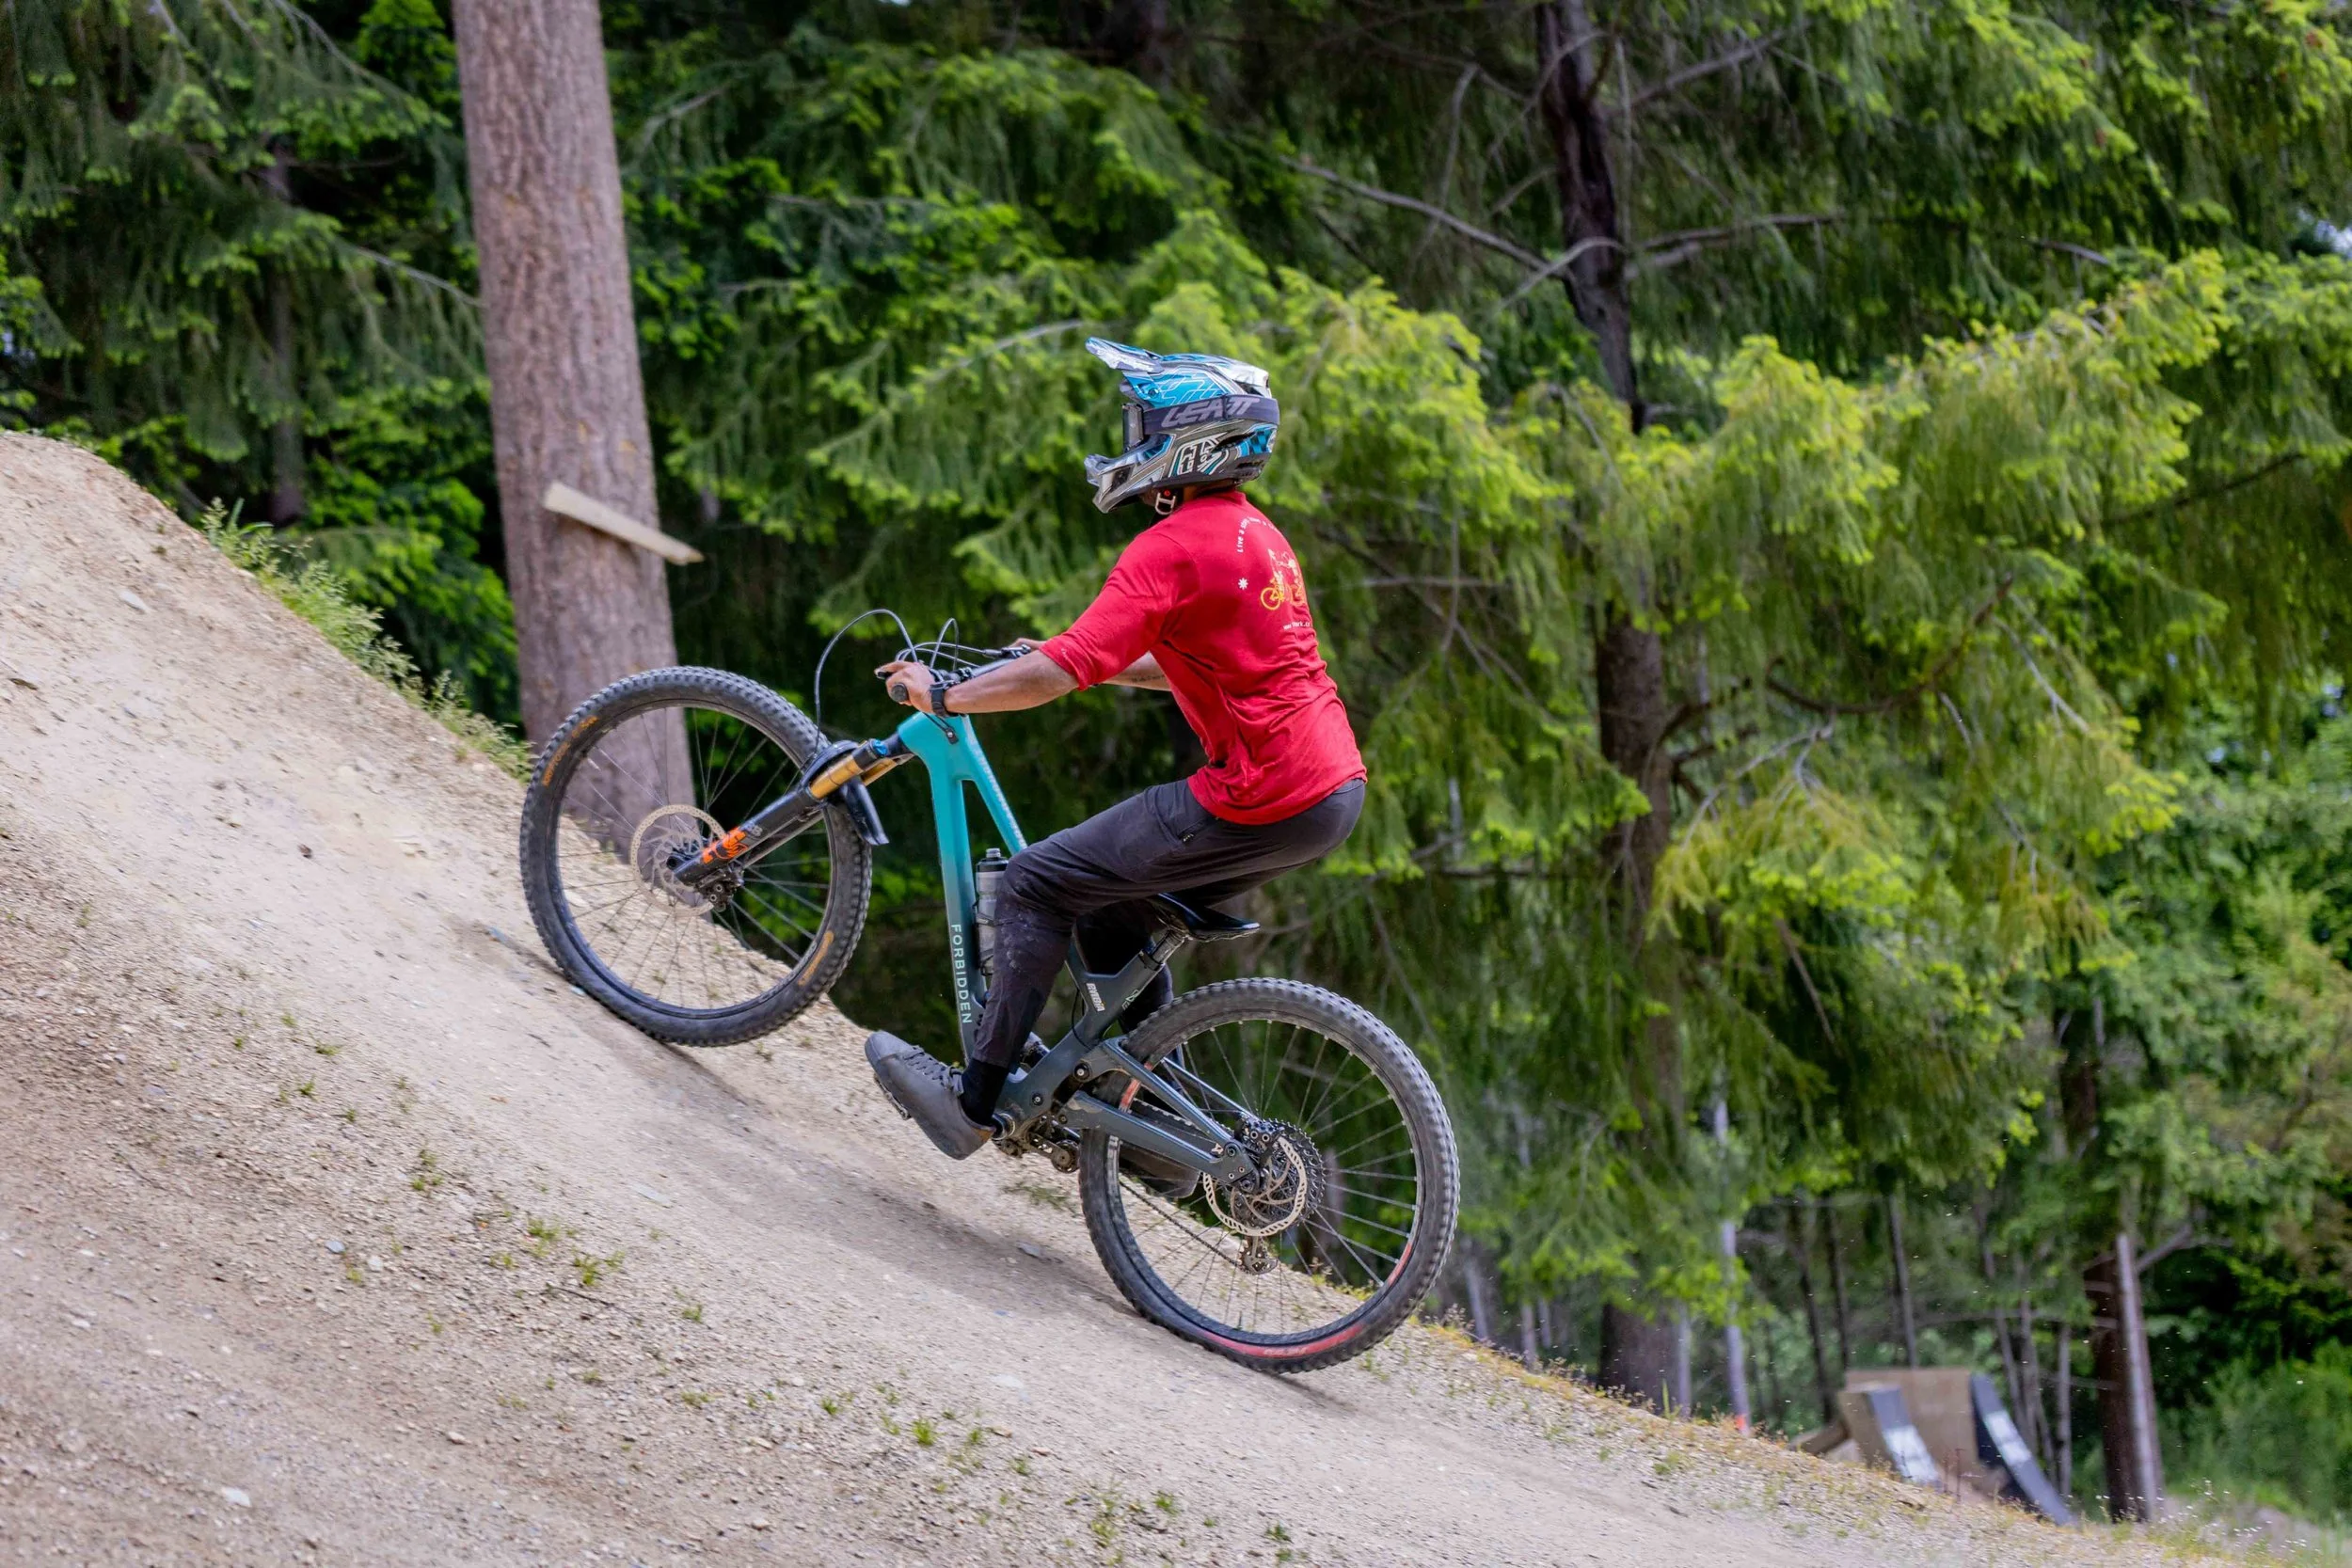
Begin Pressing at the Bottom of the Takeoff
As soon as your wheels enter the zone of compression (between the two orange cones) press evenly through your feet. This should feel like a clean, intentional press into the bike.
(We’ll talk about how much press later but for now think: smooth, consistent, and controlled.)
Maintain the Press Through the Entire Zone
The key here is not to release early. Maintain that press all the way through the zone of compression, right until just past the halfway point of the takeoff. This might feel a little scary at first and takes time getting used to so I do recommend learning this on smaller safer jumps you normally ride.
This accomplishes three critical things:
It allows you to build real pressure
As the ramp steepens, keeping the press engaged increases pressure naturally and predictably.It helps you resist the G-force created by the steep ramp
Steeper lips generate more G-force. Staying in the press keeps you centred and prevents the ramp from pushing your weight back or pitching you forward. Please note the visual reference of my chin being right over the stem with my body remaining centred and stable throughout the entire compression.It positions you perfectly to extend towards the end of the take off
Because you’ve held the press long enough, when you finally reach the lip you can extend fully allowing your legs to lengthen and you carry all that energy into the air.
If you watch skilled dirt jump riders on steep lips they don’t often absorb the takeoff. They stay in their press deep into the ramp, matching the angle of the lip, and only extend at the very end. By staying in the press until the ramp is done, they maximise their airtime without ever trying to or needing to pull up too much.
To sum things up
With your stable body position being the precursor to the techniques, both absorbing and extending on a jump are important but there should be more emphasis on learning to extend by making full use of the zone of compression, especially when riding larger take offs with steeper lips. This allows you to resist forces of the take off better and stay centred on the bike, while making you an all round adaptable rider.
Hope you guys enjoyed the read and found some useful tools to progress on riding steeper jumps. As a bonus I’d like to offer every reader of this article a complimentary video analysis via our SportSense app.
Go out and attempt a jump you are comfortable on and send us a video using the following steps.
Open/Download Whatsapp
Open chat to +64210614017
Click + Share document and select video. (This retains quality for analysis)